How to Find Professional Concrete Contractors

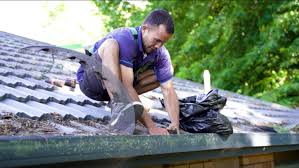
Concrete-associated work is complex and should be left to professionals with the necessary skills and expertise. It’s important to find a professional who will care about the quality of their work and will leave your home or business tidy at the end of each day.

concrete contractors

Concrete Contractors Dallas TX can help you obtain the proper permits for your construction project. They’ll also have a good understanding of building codes and regulations. Professional concrete contractors have been in the business for a long time, so they know how to do the job well. They also know how to save time in the construction process by implementing suitable construction strategies. It helps ensure the project is completed within the stipulated time frame. Professionals can also handle unforeseen issues easily on the construction site.

You can find a reliable and competent concrete contractor by asking friends and family members for recommendations. However, you must ensure that the request comes from someone with a good experience with the contractor. You should also ask the concrete contractor if they have handled similar projects. Moreover, verifying whether the concrete contractor has a license to operate in your area would be best. You can contact your state licensing board for more information if you need clarification.

Another way to find a concrete contractor is by reading reviews online. Look for a contractor with a high customer satisfaction rate and track record. You should also check if the concrete contractor offers warranties for their work. It will give you peace of mind that your concrete work will last for a long time.

Besides having a good reputation, you should also check the quality of raw materials used by the concrete contractor. The best concrete contractors use top-quality materials and do not cut corners. You should visit the construction site to see what raw materials they use.

To become a qualified concrete contractor, you must undergo an apprenticeship program and complete 5,000 hours of paid on-the-job training. Afterward, you must complete an exam to become a certified concrete technician. Then, you must obtain a license to operate in your area. The contractor must be licensed to perform commercial and residential concrete services.

While some believe hiring a professional concrete contractor is expensive, it is cheaper in the long run because they do the job right the first time. They will also help you avoid costly repairs in the future and save you money on labor costs. In addition, a concrete company will provide excellent customer service and follow all legal guidelines.

Concrete contractors have the skills and expertise to do their job well. They are licensed and insured, so you can be sure they are qualified to work on your project. Moreover, they can complete the task promptly and within budget. They will also ensure that all safety standards are met during the project.

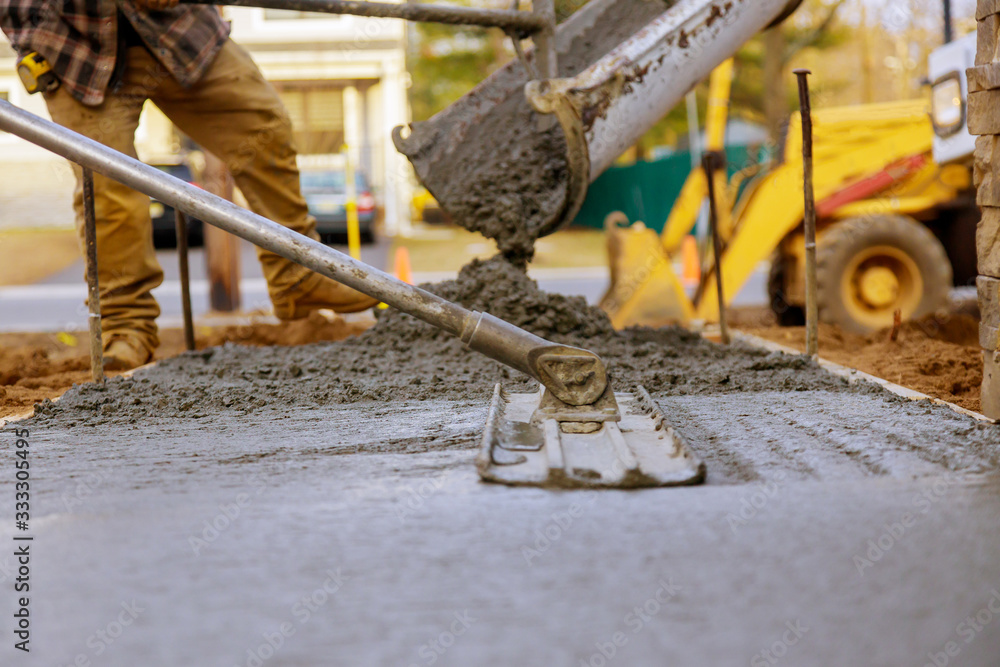
Concrete is extremely heavy and dangerous to work with if you don’t know what you are doing. Therefore, you should always hire professional concrete contractors for your home or business. They have the necessary tools and experience to complete the job immediately. It will ensure that your concrete is strong and durable and stand the test of time.

In addition to their construction skills, concrete contractors must also understand the different materials used in the concrete industry. They must be able to read blueprints and follow written and verbal instructions. They must also understand how to operate heavy equipment, such as mixers and pumps. Additionally, they must be able to use various tools for construction purposes, such as shovels, hammers, and floats.

Another important factor you should consider when choosing a concrete contractor is their ability to meet deadlines and budgets. A reputable concrete company will be able to provide you with an accurate estimate of how long your project will take, as well as the cost of the materials needed. Additionally, they can communicate clearly and openly with you throughout the process.

Besides the usual concrete work, contractors may be hired to perform excavation and site preparation. It involves backfilling and excavating the ground to prepare it for concrete laying. It also includes ensuring that the soil is properly compacted and graded to accommodate the load of the building. They will ensure that the earth is suitable for the structure and can withstand the weather conditions for years.

Concrete contractors should also be able to read and interpret drawings and blueprints and know the local construction codes and regulations. They should also be able to identify any potential problems with the site and suggest solutions.

Insurance for concrete contractors is available for a variety of risks. Typically, substantial businesses need general liability and commercial property insurance. They may also want to include professional liability and workers’ compensation insurance, which can be critical for the business. Public liability insurance protects the company if a third party is injured on the job site, such as if a client trips over a power cord or falls over a piece of concrete. Workers’ comp covers employees if injured and can not afford medical bills or lost wages.

Commercial property insurance helps cover equipment and supplies in a disaster such as fire or theft. This type of insurance may also pay to replace items damaged by certain perils, including weather and vandalism. Concrete businesses often store flammable materials and equipment at risk of heat damage and other hazards. In addition, it is wise to purchase a crime bond for your concrete business. This coverage can help pay for a client’s loss caused by an employee of your concrete company.

A workers’ compensation policy is required in most states for employees of concrete contractors. This type of coverage pays for medical treatment, lost wages, and death benefits should an employee be injured. Concrete contractors also need general business auto insurance, an additional liability coverage that may help pay for property damage or bodily injury caused by a company vehicle.

Additionally, a commercial umbrella policy provides excess liability protection if a claim exceeds the limits of the primary business auto, general liability, and workers’ compensation policies. It can help protect the concrete contractor from significant lawsuits and financial losses. Other business insurance types for concrete contractors that may be beneficial include cyber liability insurance, which covers the business from costly data breaches and hacks, and employee practice liability insurance, which can pay for legal fees and settlements if an employee is accused of discrimination or harassment.

Concrete is a key building material, and finding the right contractor can be overwhelming. There are many options out there, but it’s important to find one who can provide high-quality and dependable work. You can start by asking friends and family for recommendations or looking online for reviews of local contractors. Once you’ve found a few potential candidates, ask for references and call them to discuss the project details. Be sure to ask about their experience with the concrete contractor and whether they could complete the job on time and within budget.

A professional contractor will be experienced in handling a variety of concrete projects and will know the best way to solve any problems that may arise. They also have the skills to run different tools and can easily get the job done.

Another benefit of hiring a professional concrete contractor is that they can provide you with detailed quotes before starting the work. It will help you avoid any surprises later on and give you a better idea of how much the job will cost. Be wary of any contractors that offer a quote that is too good to be true, as they may be cutting corners, and the quality of their work will suffer.

When choosing a concrete contractor, it is important to look for one with a history of successful projects and satisfied customers. Look for a company that has worked on projects similar to yours and can provide you with photos and feedback from previous clients. It’s also important to choose a licensed and insured contractor, as this will protect you in the event of any problems.

A professional concrete contractor will save you time and money by handling all aspects of your project, from excavating the land to pouring and curing the concrete. They will also be able to suggest additional options, such as concrete stamps, that can enhance the overall look of your project.

Angular Masonry Wall Supports

Masonry brick and stone expand and contract differently. Masonry brick veneer walls are usually designed with horizontal and vertical expansion joints to accommodate these differences. Steel shelf angles are also used to support the weight of the masonry veneer above the expansion joint. You can check https://masonrycharleston.com/ for more information.

www.bagsoutletsalestore.co

The engineer sizes lintels and shelf angles to meet the strength requirements of the design code. They are secured to concrete or masonry structural systems through anchor bolts.

The shelf angle is a structural component that transfers masonry veneer wall loads back to the building’s concrete backup structure and, in many cases, eliminates the need for lintels. It’s a simple but effective design solution that prevents cracking in masonry walls by dispersing the loads across a wider area. It also maintains a gap under the brick course, which is critical to proper waterproofing and preventing moisture infiltration.

The key to proper relieving angles is that they must be properly designed and detailed for the specific wall system they are supporting. It includes determining the correct sizing of the rise and its attachment to concrete and steel structures, allowing for expansion and contraction, and ensuring a proper gap under the brick course. In addition, the masonry shelf angle should be provided with metal flashing to protect it from deterioration and water infiltration.

Unfortunately, the construction documents for this project did not provide any details of how the relieving angles were to be installed. It is not unusual, as it’s difficult to anticipate all potential installation problems and errors at pre-construction meetings. However, this omission may have resulted from a mistake or misinterpretation by the contractor.

In any event, the masons installing this project’s masonry used mortar to fill the gaps under the brick courses and tightened the last period of brick up against the underside of the shelf angle. The resulting gap under the brick is too narrow, and as the brick expands, it forces sealant out of the joint. It can lead to long vertical cracks at building corners and brick displacement at the corner of the wall.

This type of distress is often the result of insufficient gaps under the masonry and improper design and detailing of the relieving angles. To remedy this, architects can provide comprehensive masonry restoration services, including the repair of existing relieving arches. We can also thoroughly inspect the existing masonry construction to identify any concerns and recommend repairs to correct them. We can then coordinate with the contractor to ensure these repairs are made during construction and provide regular inspections of the work to verify that the repairs have succeeded.

In modern building construction, floors, interior beams, and other load-supporting portions are supported by a structure of concrete or steel covered with concrete. The outer walls are merely sheathing of brick, stone, or terra-cotta. The weight of these cladding materials is transferred to the frame using relief angles (shelf angles). In multi-story building construction, similar shelf angles are usually used to support these outer walls at practically every floor level. It makes it possible to remove a wall on any one floor without disturbing the brickwork above or below that wall.

Shelf angles are anchored to the concrete building frame with bolts. They are usually provided with a series of slots for accepting the stems of the bolts. Bolted connections are preferred to welding because they allow adjustments and provide flexibility between the structural steel and concrete masonry panel walls. The slotted bolt holes must be properly aligned with the mortarless gaps between the masonry units to ensure the fence does not sag.

It is also necessary that the shelf angle be provided with a horizontal movement joint below it to accommodate frame creep and masonry thermal expansion. It can be achieved by leaving an open (mortarless) space between the bottom of the shelf angle and the concrete masonry panel wall or by forming a compressible joint with grout. In either case, this horizontal movement joint must be sealed to prevent water intrusion.

A shelf-angle support for building construction comprising a supporting means adapted to be partially embedded in the concrete building frame, a hanger consisting of a pair of superposed metallic members, the rear member 21 having a flange portion at its lower end to extend downwardly to support the shelf angle and a front member 22 having a mating opening 23 for receiving the stemv10 of the supporting bolt. In practical use, the hanger members may be positioned by pushing the heads 12 of the bolts upwards until a portion of the rear hanger member is firmly resting against the concrete beam 17 and by swinging up the front member 22.

An expansion joint, also known as a movement joint, is an assembly designed to hold parts together while safely absorbing temperature-induced expansion and contraction of building materials. They are commonly found between sections of buildings, bridges, sidewalks, railway tracks, piping systems, ships and other structures. They prevent structural damage from occurring to adjacent concrete structures due to the stresses induced by expansion and contraction.

In brick masonry walls, an expansion joint is a vertical joint filled with a highly compressible material to allow for shrinkage. A foam filler is often preferred for the expansion joint, as it provides maximum compression and is easy to keep clean during construction. A backer rod and sealant are used to weatherproof the joint as well.

Unlike control joints, which are used to control cracking, an expansion joint is intended to handle large movements of building materials. It is also used to avoid random wall cracking. When using an expansion joint with concrete masonry, it is important to use the correct type for the project.

For example, a control joint is designed to relieve stress induced by small expansion and contraction movements caused by curing. In contrast, an expansion joint is intended to handle the larger structural movement of concrete or masonry materials.

The typical spacing of an expansion joint is 30 percent more than the distance between adjacent corners. However, expansion joints should be placed at material transitions, junctions, and offsets instead of at the hub for maximum performance. It will help to reduce the number of expansion joints needed while minimizing the potential for stress concentrations and cracking.

In addition to expansion joints in angled masonry, movement joints are needed for many construction projects. They can be utilized in poured-in-place concrete, precast and cast-in-place concrete, reinforced and prestressed concrete, steel, and composite structures. The types of movement joints vary by purpose and include joints for small movement (EMSEAL BEJS, XJS, JEP), medium movement (EMSEAL BEES and XEAS), and large movement (EMSEAL EJF and Granor AC-AR). Properly selecting and placing these joints is essential for achieving a high-quality finished product.

  1. Vertical Expansion Joints

Expansion joints usually accommodate the movement of masonry cladding. These are designed to allow for the direction of the cladding caused by a change in temperature and moisture content of the masonry. These joints are commonly found between the masonry and the structural frame of the building. It allows the masonry to move independently of the frame, reducing the risk of moisture entering the framing and damaging the internal structure.

These movement joints must be correctly designed and installed. As with all masonry construction, errors can occur during the design and installation phases, leading to future problems. Therefore, Structural Engineers must be involved in detailing masonry movement joints in external building cladding.

Different movement joints are used in masonry construction, including control, building, and construction joints. Each is designed to perform a specific function and should not be used interchangeably.

A control joint is a plane of weakness in concrete masonry, which, when used with the appropriate reinforcement, controls the location of cracking due to volume changes caused by shrinkage and creep. This type of movement joint is typically sawn, cut, or tooled into the masonry wythe and may be filled with an inelastic material such as foam or a neoprene pad.

Another common type of movement joint is a building expansion joint (or isolation joint). It is a through-the-building joint that separates the masonry from the frame and allows for the expansion and contraction of the masonry. It is often used for buildings over four stories or 12 meters tall.

In the case of angled masonry, the movement of the cladding may be unevenly distributed due to different environmental and climatic conditions. It is important to provide horizontal movement joints in the masonry to ensure the cladding is stable, especially at the intersection of walls. It is also important to ensure that the frame properly supports the cladding and that conventio

The Importance of Gutter Cleaning

Pro Gutter Cleaning Charleston removes leaves, twigs, dirt, and debris from your gutter system. Gutter professionals use a variety of tools and procedures to clean your gutters efficiently.

Gutter Cleaning

Gutter Cleaning is dangerous and can lead to serious injuries if not done properly. It’s best left to professionals.

Gutter cleaning is not one of the most fun home maintenance tasks, but it is important to keep up with because it can help protect your house from a variety of expensive problems. Gutters are designed to channel rainwater away from your home’s foundation, but clogged gutters can cause damage in many different ways.

Clogged gutters can force water from the roof into areas of the home where it’s not supposed to go, such as the basement. This can lead to flooding, mold, and other issues that are costly to repair.

In addition to basement floods, clogged gutters can cause water leaks. When rainwater can’t flow down the gutters, it will find another way to leave your home. This can result in water leaking through the roof, causing ceiling damage and wall staining. It can also leak through the walls and into the insulation in your attic, causing mold and other water damage.

Water damaged wood can rot, and wet sheet rock can crumble and fall apart. These issues are costly to fix and can pose a health risk for your family.

The main job of a gutter is to channel rain and snow away from the foundation of your home. Clogged gutters can cause erosion and damage to the soil around your house, which can weaken its foundation over time, resulting in cracks and shifting of the structure. This can also lead to a basement that’s always wet and musty, which is costly to repair.

In addition to these serious issues, a clogged gutter can also attract unwanted pests to your home. Standing water is a favorite hangout for mosquitoes and other insects that can carry diseases and make your family miserable. Insect infestations can also lead to expensive and time-consuming pest control and re-infestation efforts. Keeping your gutters clean prevents the growth of these annoying pests and can help save you money on pest control services.

Clogged Gutters Lead to Pest Infestation

If a gutter is clogged, it can become the perfect breeding ground for unwanted pests. Cockroaches, ants, and other bugs love the moist environment that a clogged gutter creates; they also have easy access to your home through the eaves. Standing water in your gutter can also breed mosquitoes, flies, and other pesky insects that can sting or carry diseases that can infect you, your family, or your pets.

Clogged gutters can also create rodent nests, and a rodent infestation can lead to severe damage to your home. Rodents can chew through wires and insulation in your attic or walls, and if they reach the interior of your home, they will cause water leaks, mold, and other damage. Clogged gutters can also attract squirrels, raccoons, birds, and other pests that can be a nuisance to your home.

The moisture that accumulates in a clogged gutter can also attract stinging pests such as wasps and bees, which may build hives in the gutters. If the hives get too large, they can also sting people or animals that pass by. Clogged gutters can also attract hornets, which can swarm homes and attack humans.

Snakes can also be a problem in clogged gutters, and they are more likely to enter a home if the gutters are filled with debris. Snakes are adept climbers, and they can use the clogged gutter as an avenue to the roof of the house where they can cause damage.

Gutter cleaning services can help you get your gutters back in working order and protect your home from potential damages. Gutter cleaning involves removing debris from your gutters, including leaves, twigs, and other organic materials. It also includes flushing out the gutters with a garden hose to remove any excess moisture. Gutter cleaning services can be performed by a professional with a ladder or power washing equipment and can include a full inspection of your gutters.

Gutter cleaning is a routine maintenance that helps keep your house in good condition. Keeping your gutters clean can prevent costly repairs and improve the appearance of your home’s exterior.

Clogged Gutters Lead to Mold and Mildew

Gutters are designed to quickly move rainwater away from the building’s structure, and if they become clogged this is not only an unsightly mess but can cause serious damage to your home. This is because, when water is trapped and not drained correctly, it can seep down walls and into the building itself, damaging insulation, windows, and even ceilings. It can also create the perfect breeding ground for mold and mildew, which can cause serious health problems in those with respiratory conditions.

As the damp conditions of a clogged gutter allow for the growth of harmful fungi, these organisms will start to spread throughout your home, producing unsightly stains and potentially toxic fumes that can cause breathing difficulties in those with asthma or other respiratory issues. This is particularly problematic when the fungi are allowed to thrive in damp areas such as the attic, where they can then travel through openings and holes to the rest of the house and cause damage.

In addition to causing damage to the interior of your home, clogged gutters can also affect the foundation of your property. This is because the role of your gutters is to deflect rainwater and melted snow away from the base of your home, protecting it from water damage and floods that can lead to cracking or shifting of the foundation itself. Leaving your gutters clogged can allow water to pool around the foundation, weakening it over time and leading to further damage as it seeps into existing cracks or creates its own.

Keeping your gutters free flowing is an easy and affordable way to protect your home from costly repairs. Ideally, you should hire a professional service to clean your gutters regularly, as they have the knowledge and experience working on ladders that can be hazardous for those who are not accustomed to it. They can also fix any damage to your gutters, ensuring that they are in good working order and are ready to do their job properly. In addition, they can also carry out a complete roof inspection to ensure that there are no underlying issues that need to be addressed.

Clogged Gutters Lead to Roof Damage

Gutters are designed to protect the roof and the structure of your home from damage caused by rainwater. But they can’t do their job properly if the gutters themselves are clogged. A clogged gutter means the water can’t be diverted away from your roof, which can cause all sorts of problems. This includes rotted wood, cracked sheetrock and water leaks that can lead to expensive repairs.

Clogged gutters also create a breeding ground for weeds, mold and mildew, which can stain the exterior of your house and deteriorate the appearance of roofing shingles. It’s important to clean the gutters and downspouts regularly to prevent these problems.

Another reason why gutters need to be cleaned is that they can get weighed down by debris and fill with standing water. When this happens, the gutters may begin to sag or even fall off of the fascia board. This can be dangerous and needs to be fixed as soon as possible.

Clogged gutters allow water to build up on the roof and saturate the insulation. This can cause a lot of damage in a short amount of time and lead to a lot of problems, including mold, mildew and rotting wood. It can also lead to leaking ceilings and water spots on walls inside your home.

Gutters that are clogged can also lead to leaks and floods around the foundation of your home. When rainwater can’t escape your gutters, it can soak the soil around your foundation, which will weaken the foundation over time. This can lead to cracks or even collapse your foundation.

Clogged gutters can also be dangerous to clean yourself. You should always hire a professional with proper equipment and safety training to clean your gutters. Ladders should be used with caution, and you should never attempt to reach the gutter from the roof. It’s a very dangerous task that can result in serious injury. There are special attachments for pressure washers that can help you clean the gutters, downspouts and drains safely from the ground.

Home Deck Building Basics

A home deck is perfect for entertaining, family relaxation, and outdoor cooking. Most communities require a permit and a home inspection to ensure the structure is up to code. A home deck is a great way to make the most of your outdoor living space and add value to your home. , it is important to use the right materials for the job to ensure a safe and stable structure. To find out the perfect deck for your home, visit https://deckbuilderscharleston.com/

https://deckbuilderscharleston.com/

Common building materials include pressure-treated wood, gravel, and concrete footings or piers. The foundation for the deck is a key element that determines the stability of the entire deck. Ideally, the foundation should be on a solid footing or pier, not directly attached to the house. The best type of material for this purpose is poured concrete. You will need a shovel, a jackhammer or other demolition tools, and concrete to construct the foundation. You will also need 2-by-6-inch pine boards for forms and steel stakes. Before starting the project, consult a blueprint or plan and read some books on deck construction. It will help you understand the different steps involved in building a deck.

The type of wood used for the decking can greatly impact cost and workability. The most common option is treated pine lumber. It is durable and can be stained or painted. It is also environmentally friendly, and many builders prefer it to cedarwood. Another option is composites, which are made of a blend of recycled plastic and waste wood fibers. They look like real wood and come in a variety of natural-looking hues. They also resist mildew and splinters. Although they are more expensive than real wood, they may be cheaper in the long run.

Once the decking and other structural materials are in place, the joists and beams need to be fastened to them. It is important to use a power sander for this process. You should also wear a dust mask to remove toxins from your nose and lungs. Using the correct sandpaper grit would be best to avoid damaging the wood. Once the deck is finished, it must be properly sanded before staining and each time before new layers of stain are applied.

Before you build a home deck, it’s important to think about its design. The style should be in keeping with your home’s overall look so that the deck feels like an extension of the house rather than a separate structure. Moreover, the deck should be safe and practical for you and your family. A good way to ensure this is to get the right estimates from professional contractors. Be sure to have them come to your home so they can take accurate measurements and see any obstacles that may affect the layout of your deck.

The first step in designing your deck is to determine its location. It will depend on what you intend to do with the space, such as large parties, family relaxation, or outdoor cooking. You will also want to consider the amount of sunlight and shade you desire. For example, a deck on the east side of a house will provide more shade in the afternoon than one on the west.

If your deck is to be open to the weather, you’ll need to add a roof or awning for protection from rain and direct sun. In addition, you’ll need to factor in the potential for snow load on the structure and plan accordingly.

Various materials can create contrast and visual interest on a deck. For example, combine wood with stone walkways or install copper post caps on your railings. Using different stain colors can also create a striking effect.

Before starting construction, it’s a good idea to review local codes and regulations on the size and type of deck you can build. In some jurisdictions, you may need a permit to construct a deck. Obtaining the necessary permits before beginning construction can help you avoid costly delays and legal complications.

It’s also a good idea to check with your homeowners’ association or neighborhood homeowners’ committee to learn about any restrictions. Some communities and neighborhoods may require that a deck be built with certain materials or constructed within a certain height range.

If you’re considering adding a deck to your home, you should first figure out how much it will cost. The amount you spend will be largely determined by the size of your house and how large or small you want the deck to be. In addition, the cost will also be determined by the type of material you choose and any additional design features you might like to include, such as a staircase or pergola. You may need to apply for a permit for your deck, and the price of these can vary by municipality. It would be best to remember that a deck can increase your property taxes, so be sure to check with your local tax collector for more details.

Another important factor to consider when planning your deck is how it will be used. Some people want a place to relax and unwind, while others want a space for parties or outdoor cooking. It will help you decide the best location and size for your deck and what options you wish to incorporate, such as a built-in grill, fireplace, or hot tub.

It’s also important to consider the amount of labor needed. Some materials, such as cedar and treated pine, are more expensive than others, and the work required to build them can add up quickly. Other costs are fasteners, joist hangers, concrete, and stain or paint. These items can add up to several hundred to more than a thousand dollars, so factoring these into your budget is essential.

Building permits and the cost of labor can also vary by region. Most municipalities require a license for decks over a certain height or square footage, and the price of these can range from a few hundred to a few thousand dollars. You should also be aware that many cities and towns have rules regarding how close your deck can be to your property lines, so contact your city or town hall about this before beginning construction.

Purchasing a deck is a substantial financial investment, so choosing a contractor you can trust to do quality work is important. Start by asking for references from friends and neighbors. You can also find out more about a contractor’s reputation by searching online for reviews and information about their previous projects. Also, ask about the contractor’s insurance coverage and whether they carry worker’s compensation insurance in case of an accident.

Once you’ve identified a few potential contractors, it’s a good idea to interview them for the job. During the interview, you can learn more about their expertise and what they can do to help you create your dream deck. Some things to look for include how long the company has been in business, their methods and techniques, which materials they use, and examples of previous work. It’s also good to ask about their availability and how soon they can start working on your project.

Before hiring a contractor, it’s essential to get a written estimate. It should include a description of the work, a detailed rendering of the deck, and a breakdown of the specific materials used. The assessment should also specify the estimated time frame for completion of the work.

Meeting with the contractor face-to-face before starting the project is also a good idea. It will give you a better sense of whether their vision aligns with your expectations and the terrain of your backyard. The contractor can also explain how they plan to build the structure and address any issues that might arise during construction. For example, they suggest adding post support in an area where you’re concerned about the ground shifting over time.

It’s also good to talk with the contractor about how they handled past projects and any setbacks or glitches that arose during construction. You’ll want to ensure they can stick to their schedule and finish the deck by the expected date. If they cannot meet your expectations, knowing if you can negotiate or get out of the contract without penalty is important.

Hardwood Floor Refinishing – A Cost-Effective and Eco-Friendly Option

Hardwood Floor Refinishing Bergen County NJ is a great way to revitalize your space and add a unique look to your home or office. It’s also a cost-effective and eco-friendly option.

Hardwood Floor Refinishing

Before you sand your floors, remove all furniture and cover any objects or appliances with plastic sheeting to protect them from sanding dust. Also, tape up outlets and crevices to keep sanding dust out of them.

Hardwood floors add a timeless elegance to any home. Refinishing them is an eco-friendly way to refresh your space if they are worn or damaged. This process involves sanding down the hardwood and adding a new finish to return its original shine. It also helps remove any scratches and dents that aren’t easily removed with buffing or polishing alone.

When refinishing hardwood floors, hiring a professional wood floor finishing company is recommended to ensure you’ll get the best results. This is especially important if you’re sanding down the entire floor or changing the color of your hardwood. Trained professionals will be able to work quickly and efficiently without damaging the wood. This will save you time and money.

Another way to make your refinishing project greener is to use low- or no-VOC stains, paints, and sealers. These types of products contain fewer chemicals and emit less odor, which is helpful for those who have sensitive skin or asthma. They will also cure faster, which can help reduce your overall environmental impact.

Choosing an eco-friendly wood finish can also help preserve your hardwood flooring for longer. A properly maintained hardwood floor will look better for a longer period of time, so you won’t need to refinish it as frequently. Using felt pads on furniture legs, placing area rugs in high-traffic areas, and immediate cleaning of spills are just a few simple things that can be done to prevent wear and tear.

It’s also important to understand the difference between refinishing and resurfacing hardwood floors. Refinishing is the complete removal of a floor’s current finish down to the bare wood, while resurfacing only buffs and polishes the existing wood to remove minor scratches and dings.

A full refinish can take four to seven days, depending on the size of your space and the type of finish used. Once the floors are finished, they will need to dry completely before you can move your furniture back in. To speed up the drying process, consider using a water-based polyurethane finish as it will dry more quickly than an oil-based version. It will also stay clear over time, whereas oil-based finishes can yellow with age.

It’s Affordable

Hardwood floors are extremely durable, but they’re not immune to wear and tear. Over time, scuffs and scratches can dull the appeal of hardwood flooring, and if your wood floors have deep scratches or gouges, they may need to be refinished. However, refinishing is typically less expensive than replacing your flooring altogether.

The type of hardwood flooring you have in your home can also affect the cost of refinishing. Common types of wood like oak and maple are easier to work with, so refinishing these floors tends to be cheaper. On the other hand, softer woods can be more susceptible to damage and require special care during refinishing.

In addition to the costs associated with sanding and staining, homeowners should budget for the cost of materials. This can include sandpaper, a belt sander, an edger, brushes, safety gear, a shop vacuum, and cleaning supplies. These expenses add up quickly, and if you make a mistake during the refinishing process, it could be costly.

You’ll also need to consider the square footage of your flooring when calculating the cost of refinishing. The more floor space you have, the more it will cost to refinish. Additionally, some contractors charge an additional fee to move furniture out of a room. This can range from $20 to $50 per room, depending on the contractor.

Refinishing can take care of minor scratches and dings, but if your hardwood floors have significant damage or need major repairs, it’s likely more cost-effective to replace your flooring altogether. Replacing your floors will ensure they last longer and improve the resale value of your home.

Cupping occurs when hardwood floors start to cave in down the middle of each plank. This is often caused by excessive moisture. Refinishing can fix this problem by sanding down the entire floor and applying a protective finish.

Refinishing your hardwood floors can also help prevent splinters. This is a common issue that can happen when your flooring is worn down, especially in high-traffic areas. Refinishing can smooth out rough spots and make it safe to walk barefoot in your home.

It’s Easy to Maintain

One of the best things about hardwood floor refinishing is that it’s relatively easy to maintain over time. It’s also a great way to add a timeless look that can be appreciated for years to come. This process may require a bit of patience, as there is no getting around waiting for paint, glue, or stain to dry completely, but it’s well worth the wait when you’re left with gorgeous floors that will last for decades.

The most important thing to consider when refinishing your wood floors is what type of finish you want to use. There are three primary options, according to Pro Floor Tips: acid cured, water-based, and polyurethane. It’s recommended to opt for a polyurethane finish because it is more durable and can be easily cleaned using a damp mop or cloth. It’s also easy to apply and dries quickly. Once you’ve decided on a finish, it’s also important to determine what sheen level you want, which can be matte, satin, semi-gloss, or glossy (via The Flooring Girl).

When it comes to the actual refinishing process, there are a few steps involved that aren’t always easy for homeowners to do on their own. First, it’s necessary to thoroughly vacuum and then clean the floors to remove any dust or dirt from the surface. Next, the floor must be sanded. A drum or orbital sander is used to remove the existing finish and top layer of wood, exposing fresh wood underneath. The sanding process can be time-consuming and messy, and requires a good understanding of how to properly operate the sander.

Once the sanding is complete, a new coat of stain can be applied. Staining isn’t as difficult as sanding, but it does require careful attention to detail and knowledge of how to correctly mix stain and apply it evenly. There are a number of DIY kits available, but it’s recommended to hire a professional if you don’t have the proper experience.

Hardwood floor refinishing is a cost-effective and eco-friendly way to revitalize your home or business. It’s an ideal option if your floors are showing signs of wear and tear that can’t be fixed with a simple reseal. It’s also an excellent way to increase the value of your home if you plan to sell it in the future.

It’s Time-Saving

Hardwood floor refinishing is not only cost-effective, but it also saves homeowners time in the long run. This is because refinishing your hardwood floors gives them a protective finish that repels dirt, spills, and stains. Therefore, they are much easier to keep clean with regular sweeping and mopping. As a result, you will spend less time cleaning and more time enjoying your hardwood floors.

In addition, refinishing your wood floors will increase the resale value of your home. This is because potential buyers will see that the floors have been cared for. Furthermore, the addition of a fresh coat of polyurethane will give your hardwood floors added strength and durability that will make them last longer.

When choosing a contractor to refinish your hardwood floors, you should always get multiple estimates. This will help you find the best price for the work that needs to be done. In addition, you should make sure that the contractor you choose has a good reputation and is licensed and insured. Finally, be sure to take care of the cleaning before and after your refinishing project. This includes vacuuming, dusting, and mopping. Make sure that you do not use any oil-based cleaners, as this may affect the ability of the final coating to adhere to your wood floors.

Before refinishing your wood floors, you will need to remove all furniture and carpets from the rooms that will be worked on. It is important to do this so that the abrasion process will not damage your furniture. You should also remove any pets from the area to protect them from the strong fumes that are released during the refinishing process.

Once the abrasion process has been completed, you can begin to refinish your wood floors. It is important to follow the manufacturer’s instructions closely to ensure that your refinishing job turns out correctly. Once the refinishing has been completed, you will need to wait a few days before moving your furniture back into the room.

Hardwood flooring is a beautiful and timeless option for any home. However, over time, it can become damaged and worn. Refinishing your hardwood floors is an effective way to restore their beauty and add value to your home.

How to Keep Your Fence in Top Shape

Over time, weather and general use can take a toll on fences. Many problems can be prevented by regularly inspecting and performing maintenance.

Fence

A leaning fence can result from a storm or ground shifting around a post base. Fixing this problem requires digging around the post, securing it with braces, and refilling the hole.

Fences are comprised of many different parts, each of which must be in top shape for the entire structure to function at its best. Fence repairs are necessary when these parts are damaged, rotting, or otherwise in need of repair. This can include anything from a simple post cap to the more complex lumber rails and gates. The cost of these repairs depends on the extent of the damage and the amount of work involved in repairing it.

The posts that hold up the panels and rails of a fence are among its most important components. When the posts become loose or rot, it can cause sections of the fence to sag or even fall down entirely. This is why the posts should be inspected regularly and repaired as soon as any issues are identified.

It is possible to fix some of the problems with the fence posts by using a special type of putty or glue. However, these types of repair methods can be time consuming and may require the help of an experienced professional. It is also recommended to regularly apply weather-resistant wood stain or sealant to protect the posts from moisture and other elements that can lead to rot and other damage.

Another quick and inexpensive way to repair a loose or rotting fence post is to use a steel support stake. These strong metal stakes act like a secure splint to secure the post in place, and they can be hammered into the ground using a standard sledgehammer. This method is particularly useful when the rot or loosening of the post is isolated to the footer area and does not affect the integrity of the rest of the fence.

When the rot is more widespread or if the fence post is set in concrete, it may be necessary to dig out the existing footer and replace it with a new one. This is the preferred and most secure way of replacing a fence post, and it requires the assistance of an expert or an experienced DIYer.

Replacing a fence post that is set in concrete can be challenging and requires specialized tools. It is often recommended to hire an expert if this job is being done for the first time, as it can be dangerous and requires a significant learning curve.

Panels

Wood fence panels are a backyard staple, offering both privacy and security. They’re designed to stand up to harsh weather conditions, and if properly treated and maintained, they can last for decades. However, like all things, they’re susceptible to damage and wear over time.

Fences that have been damaged or worn may require repair or replacement of panels. This can be due to a variety of reasons, from extreme weather conditions to animals that dig or chew on the panels. Depending on the amount of damage, it’s important to assess whether or not it’s worth repairing and how much it will cost to replace the panel.

Having to repair or replace a fence panel can add up to a substantial cost. In addition to the materials, labor costs will be a factor when calculating the total cost of repairs.

If the damage is extensive and it’s difficult to determine whether or not it’s worth repairing, the fence may need to be replaced altogether. A new fence will be more expensive than repairing or replacing existing fence panels, but it can provide long-term peace of mind.

Measuring for new fence panels is a crucial step in ensuring that the final product will be fit and sturdy. This can be a difficult task because there may be variations per panel, but it’s important to get the measurements right in order to ensure that the fence will look good and will be strong.

Fence Panel Realignment

Over time, wooden fence panels can become misaligned. This can affect both their functionality and appearance. This can be remedied by re-aligning and reattaching the panels to ensure that the fence is straight. This will also help to reduce future misalignments.

Cracks or Breaks

Eventually, every fence will experience some sort of crack or break. These can occur for a variety of reasons, including environmental factors or simply age and stress. Small cracks can be repaired using a special vinyl filler, while larger cracks or breaks should be replaced with a new panel to ensure safety and security.

If a section of your fence is in need of a new panel, you’ll need to measure the old one in order to know how long to cut the new panel. You’ll also need to make sure that the new panel is the same size as the old one so that it fits properly. Once the panel is in place, it can be secured with new nails or screws to ensure that it stays secure.

Rails

The rails of a fence are what connect one post to the next, forming the foundation for your fence. They are essential for maintaining a safe, sturdy fencing system and need to be kept in good condition. Damage to your fence rails can lead to a number of problems, including warping and sagging. Wooden fences that suffer from these issues are often a tripping hazard for you and your guests. If your wooden fence has rails that are loose or rotting, you should repair them as soon as possible.

Repairing a damaged rail requires that you first apply a generous coat of wood preservative to the surface. This will help to prevent rot from spreading from the affected area to other parts of the rail. You may then hammer two pieces of scrap 2×4 on either side of the rail to help hold it in place. If the rail is completely rotten, you will need to replace it entirely.

In addition to rot, the rails of your fence can also be damaged by insects and moisture. Termite infestations are particularly dangerous and should be treated immediately. After getting rid of the pests, you will need to stain or repaint the area to protect against fungi growth. This can add up to a substantial amount of money, but will ensure that your fence is safe and secure for your family and pets.

Wooden fences can also become damaged by storms. Strong winds can cause a fence to lean, and they can also knock down or pull up sections of your fencing. In some cases, homeowners will need to repair the fence after a major storm to prevent further damage from wind and falling trees.

Some fences can be straightened after a serious storm. If yours is crooked, you should take care of this as quickly as possible to avoid more expensive repairs in the future. A professional can usually straighten a fence without much trouble by realigning the posts and using a brace or temporary diagonal supports. You can also try to straighten a fence yourself if the problem is only minor.

Hardware

The hardware that holds your fence together is critical to the overall structure, so if you have any broken components they should be fixed immediately. This is especially important for gates, as they are used frequently and can be subject to more wear and tear than other parts of your fence. If you have a faulty gate, it can make your entire fence look unfinished and sloppy. A good way to fix this is by installing an anti-sag cable kit, which lifts the far corner of your gate to prevent it from dragging or pulling, and then can be secured with brackets or screws.

A damaged gate can also affect how well your fence is anchored to the ground, and can lead to issues like sagging or leaning. It’s a good idea to have your gate and hardware checked regularly by a fence professional so that any problems can be fixed before they become larger and more costly.

Wooden fences are a popular choice for homeowners due to their affordability and natural appearance, but they are still vulnerable to damage from the elements. Acute damage, such as a fallen tree branch, can be repaired quickly, but chronic damages should be considered as signs that your fence may need replacement.

Wrought iron fences can develop rust and corrosion over time, particularly in areas with high humidity and moisture. If the rust is minor, it can often be repaired with a sanding and re-painting process. If the rust is more severe, it can be repaired with a special epoxy repair putty that is applied to the affected area and then hardened. This product is easy to apply and is relatively inexpensive.

Wooden fences can also be damaged by rot or decay, particularly if they are exposed to excessive moisture or humidity. In some cases, a damaged section of the fence can be repaired by replacing it with new wooden boards and treating them with wood preservatives. This is a more cost-effective option than repairing the rotting sections and replacing the entire fence.

Add Value To Your Home With A Room Addition

A room addition can be a big undertaking, but it also adds value to your home. You can design the space to meet your family’s needs and expectations.

It’s a great solution for families with children, elderly parents, or extended houseguests. It also helps avoid the cost of a move to a new location. If you are thinking of adding another room to your home, contact J&R Construction today!   

room addition

Gaining Extra Space

Whether your family is growing or you need an additional home office, bedroom, or bathroom, a room addition can increase the amount of living space in your house. It can also help you accommodate guests, provide more storage space, or make room for hobbies and leisure activities. When compared to moving to a larger home, adding space is a more affordable and less disruptive option for homeowners in the market to upgrade their living situation.

A house bumps-out or room addition is a single-room structure built to expand the size of a room in your existing home. The size of the expansion is usually limited by the available space in your property and your budget. Room additions can also include the creation of a new roofline that employs either a shed style or a flat roof.

One of the biggest reasons for a room addition is to accommodate a growing family. As children grow, parents might find that they need a dedicated bedroom for each child, while teenagers might want their own space to relax or entertain friends. If you have young kids and you’re starting to run out of space, a room addition can give you the extra bedrooms you need without having to move to a new home.

Other homeowners may be planning for an upcoming empty nest scenario, or they might be anticipating that aging relatives will need to live with them in the future. In these scenarios, a room addition can be a valuable investment that can allow you to stay in your current home for the rest of your life while increasing the value and functionality of your property.

Regardless of the reason, it is important to carefully consider your goals and needs before deciding on the type of room addition that is right for you. Home remodeling professionals can offer advice and guidance to help you narrow down your options, but ultimately the choice is up to you. To get the best return on your investment, be sure to design a room addition that is multipurpose and will appeal to potential buyers in the future. For example, including a closet and heating are two features that will make your addition more attractive to homebuyers down the road.

Aesthetics

A well-designed room addition can enhance the aesthetics of your home, transforming it into a beautiful place to live. By working with a professional contractor, you can create a design that combines your needs and budget with the architectural features of your home to create a functional and aesthetically pleasing space.

For example, if your current bedroom doesn’t have high ceilings, adding decorative wooden beams can make it look taller and more spacious. By choosing materials that blend with your home’s architecture, you can create a seamless transition between the old and new rooms.

Whether you’re looking to create a relaxing sanctuary or a fun and eclectic hangout, your new room can be transformed into anything you want it to be. The aesthetics of a room can also be used as a way to express your style, with decor elements like plants, wall collages, and thrifted items bringing in an organic vibe.

One of the most popular trends in aesthetic rooms is the use of greenery, which can add a touch of nature to your room without requiring much maintenance. Faux or real vines are ideal, and they can be hung from the ceiling or draped across a wall for a whimsical feel. Adding dried pampas grass to the mix adds a natural scent and a touch of texture.

Another element that’s often seen in aesthetic rooms is a photo wall collage. This can be a great way to show off your interests and favorite memories while adding a pop of color to the room. Rather than using prints or posters, try creating a collage with magazine cutouts to keep it budget-friendly.

Aesthetic rooms also feature a variety of light fixtures, including LED strands and string lights. These can be a fun way to add some ambiance to your bedroom, and they work especially well when mixed with aesthetic fairy lights.

A big bedroom can be a wonderful opportunity to treat yourself to some bold decor pieces, such as a statement mirror or canopy bed frame. However, it’s important to balance these with neutral colors and finishes so that the space doesn’t become too busy.

Functionality

Room additions not only add living space but also help increase your home’s functionality. A properly designed room addition can provide a solution to a problem that you may be experiencing or upgrade your lifestyle for family, entertaining guests, or everyday organization.

For example, if you have a lot of toys and books that are cluttering up your family area or kitchen, a room addition can be a great way to create a reading room with built-in shelves or custom cabinetry. This will help to minimize wear and tear on other areas of your home as well as make it easier for everyone to find what they need.

Other functional benefits include creating a music room or a workout room. These rooms can be designed with extra soundproofing or insulation to help reduce noise in other parts of the house. In addition, music and exercise rooms can be designed with additional lighting to make working out or playing more enjoyable.

One of the best reasons to consider a room addition is to accommodate a growing family or aging parents. Adding a bedroom or an extra bathroom to your home can be the perfect solution to these situations. By providing your family with the space they need, you can avoid having to move and save the stress and expense that often comes along with it.

When designing your room addition, keep in mind that it will likely be a part of your home for a long time to come. To ensure that your investment pays off later on, it’s important to incorporate smart design features that will appeal to future buyers. This might include an open floor plan, large windows or French doors, and updated lighting.

A room addition can be a worthwhile project for homeowners who are considering selling their home in the future. If this is a possibility for you, it’s important to consult with real estate agents in your area to determine what type of renovations will be the most desirable to prospective buyers. The right room addition can significantly boost your property value and provide you with a good return on your investment when it comes time to sell.

Home Value

When building a home addition, it’s important to consider how it will impact resale value. A well-designed room addition can add a considerable amount of value to your home, depending on what type of space you create. The number of bedrooms and bathrooms can be significant selling points, especially for families. A home office is also highly desirable in today’s market, as is a kitchen extension that opens up into an eating or living space.

A room addition can also include extra space for recreation, such as a man cave, art studio, or meditation space. These types of additions can be a great selling point if you decide to sell your house in the future.

One of the most expensive parts of any room addition is the cost of labor. However, there are ways you can cut the costs of a room addition by doing some of the work yourself. If you’re willing to spend time learning how to build a room addition, you can save on labor costs. For example, most construction materials come in lengths of eight feet; if you can construct your new space using two-by-fours that are all 8 feet long, you can save on material costs.

You can also save money on a room addition by choosing to build a prefabricated structure rather than a traditional one. A prefabricated or modular room can cost between $9,000 and $40,000. This is a great option if you want to save on the upfront costs of a new space.

If you’re thinking of moving in a few years, it may be wise to invest in a room addition that will meet your current needs and those of any future family members. A bump-out to accommodate a larger dining table or a sunroom that can be used year-round will be attractive to buyers.

A major renovation like a room addition can seem intimidating, but it’s often less costly and more stress-free than moving to a bigger house. By following a few simple tips, you can make your new addition a truly worthwhile investment.

The Basics of Plumbing

Bryco Plumbing is a hands-on trade that requires basic math and science skills. In addition, it requires patience and a strong work ethic.

Plumbing

Your employer and clients expect your work to be done correctly the first time. Nobody likes callbacks. Take the time to get things right! This will pay off in the long run.

While plumbing is usually invisible to the homeowner, it is one of the most important parts of a home’s structure. It’s a complex network of pipes that brings water in and takes waste out, connecting different fixtures like sinks, showers, toilets, washing machines, dishwashers, and so on. Many professional residential designers thoroughly map out a house’s plumbing layout to ensure everything connects correctly and is up to code.

The pipe layout in a plumbing plan is the blueprint that shows the location of each fixture and the pipes that will run between them. It’s essential for plumbers to be able to see the layout of a plumbing system before beginning to install it so that they know what to expect and can make any necessary adjustments. A detailed pipe layout also helps prevent costly mistakes by ensuring that all the drains, vents, and water lines are properly routed and supported.

In a plumbing plan, each fixture is represented by a symbol that corresponds to its name on the drawing. The pipes that connect the fixtures are shown as solid or broken lines. It’s important to use a gridded straightedge and scale to draw your plumbing plans so that they are accurate and easy to read. It’s also helpful to color-code each element of a plumbing plan so that it is easy to distinguish between supply and drain lines. You should also include a list of the fixture names and types, the pipe sizes, and any other important information.

A detailed plumbing plan is an invaluable tool for any new construction project. It will help you plan your plumbing fixtures and create a diagram that you can share with contractors to get an idea of what you want your plumbing to look like. A detailed plumbing plan will also help you determine the size of your pipe run and choose the right type of fittings for each fixture.

Creating a plumbing plan is relatively easy with a program such as EdrawMax. The program provides a variety of templates, symbols, scalable options, and remote collaboration capabilities to help you create a plumbing plan that meets your exact needs.

Isometric Drawing

An isometric drawing in plumbing is a specialized 2D drawing that provides a detailed illustration of the layout and configuration of pipes, fittings and fixtures. This type of drawing is used during the construction phase, and it helps to ensure that all piping and equipment is properly installed. It also allows for accurate measurement of piping components.

Isometric drawings are typically created during the detail design phase of a piping project, after the P&ID and other high-level drawings have been completed. They are often drawn on preprinted paper, with lines of equilateral triangles that form 60° angles. These drawings are a 2D representation of 3D piping designs, and they can help with the layout, fabrication, installation, and maintenance of the process.

Some notable features of a piping isometric drawing include: Hatches on the drawings indicate which direction the pipe travels. This information is important because it tells the reader whether a pipe runs to the north, south, east, or west. It can also be helpful for determining the weight of a pipe. A piping isometric drawing should also contain flow arrows, which are used to indicate the direction of flow and the devices that it serves.

A piping isometric drawing should be proportionate and provide accurate dimensions of all components and equipment. The drawing should also show the locations of all flanges and valves, as well as their dimensions. This can help with the planning and cost estimation of the piping system.

Creating an isometric drawing can be challenging, but it can also be a valuable tool for plumbing professionals. By learning how to create these specialized diagrams, plumbers can be sure that their installations are done correctly and efficiently.

Learning how to read a piping isometric drawing is a vital skill for any plumbing professional. Aside from illustrating the exact location of pipework and fixtures, it can also help in the interpretation of other types of technical drawings, such as P&IDs. Aside from this, it can also give an idea of the required materials for a particular task. This can be an important factor in ensuring the quality of work and reducing costs.

Rough-In Drawing

The plumbing rough-in phase is an important part of the overall construction process. It’s the stage where plumbers install vents, waste systems, water lines, and connections. This is done before installing drywall or flooring. This phase is crucial for a plumbing system’s function and longevity. If this stage isn’t done correctly, it can lead to leaks and other issues. It’s also an investment for the future, as it prevents maintenance problems and extends the life of pipes and fixtures.

Rough-in plumbing requires a lot of planning and attention to detail. For this reason, it’s best to leave this type of work to a professional. This plumbing phase involves installing pipes from the main water line to the house, installing the sewage system, and connecting all the drain lines and supply valves. It’s also the time to remove any caps on the drain and supply lines, set up under sink drain assemblies, and install toilet and shower valves. During this phase, the plumber may also drill holes for hose bib lines and install them outside the house.

The first step in the rough-in plumbing process is to create a diagram of the pipe layout. A plumber will use a drafting 30-60-90 plastic triangle to do this, which is available at stores that sell drafting supplies. This type of triangle is ideal because it allows the plumber to mark the angle required for sloped pipes. It’s also helpful for showing changes in direction.

Once the plumbing rough-in is complete, it’s time to test the new system. This is where the plumber will check for any leaks. If any are found, the plumber will repair them before continuing with the finish plumbing.

A professional plumbing service can help with all aspects of the plumbing rough-in process. They will help ensure that the pipes are properly sized and routed to avoid any leaks or blockages. They will also inspect the finished plumbing to make sure it’s up to code.

Many homeowners choose to take on the rough-in plumbing themselves, but this can be a dangerous job. It’s best to leave this task to a professional to avoid any accidents or mistakes that could lead to costly repairs down the road.

Symbols

The plumbing system in a building is a network that carries water to various points in the house where it is used for cooking, washing, heating, and drinking. This system also conveys waste water and sewage to a wastewater treatment plant or disposal area. A plumber is a skilled tradesperson who installs and repairs these systems. The piping system is usually constructed from metal or PVC, and the plumbing fixtures are connected to these pipes. The main components of a plumbing system are the water supply and water distribution system, the waste disposal system, and the drainage system.

A plumbing plan can be made using symbols, a graphical way of representing equipment and parts in a diagram. There are many different symbols available, and each one has a specific meaning. Some examples include a faucet, drain, and toilet. A faucet is a fixture that can be turned on and off by turning a handle, while a toilet is a fixture that flushes waste away from the human body.

A good plumbing drawing is important for the proper functioning of a building. It ensures that water and gas is supplied, provides drainage passages, and prevents pipeline destruction. It is also helpful in maintaining the connection by indicating where the tools are located. It is possible to make a plumbing plan easily using the help of software. This software is available for free and provides a library of templates and over 260,000 vector symbols. Some of the most popular options include Edraw Max, SmartDraw, and QUICK PLUMB.

Edraw Max offers a variety of templates and a comprehensive symbol library with thousands of plumbing plan symbols. It also supports isometric drawings, 3D renderings, and auto pipe sizing. Its intuitive interface and advanced features allow users to create high-quality diagrams quickly. It is free for simple system designs, but full access to its symbol libraries starts at $99 per month.

Creating plumbing plans can be time-consuming, but with the right software, it can be easy and efficient. Using an online template can save time and money, and can ensure the accuracy of your work. Using a tool like EdrawMax is an excellent choice, as it allows you to customize the templates and icons according to your needs.